Showing posts with label recipe level 2. Show all posts
Showing posts with label recipe level 2. Show all posts
Tsinoy Foodies is approaching its 10th year on October. How does one indulge in being a foodie and yet keep our bodies healthy?
The key is to have a healthy lifestyle which mainly depends on a healthy diet. Believe it or not, I rarely eat white rice because there are a lot of healthier options available.
 |
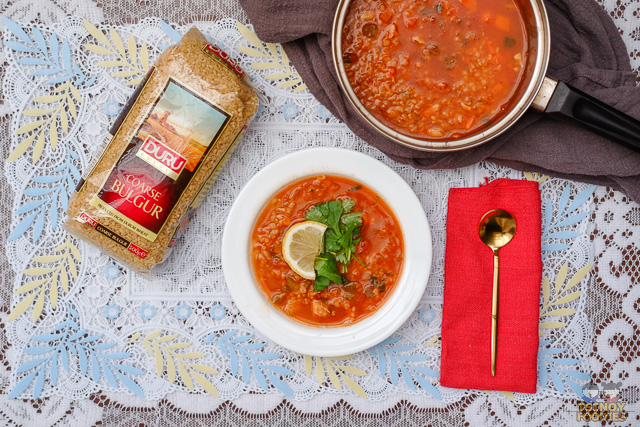
| Chicken Bulgur Soup |
My
latest discovery is Duru Bulgur. Duru means pure and clean.
Fortunately for us, this brand of Bulgur is locally available in three
grain sizes: Fine, Coarse and Extra Coarse.
Bulgur
is actually the staple grain in Turkey. It is considered a superfood
as it offers twice more fiber than rice and a lower glycemic index. It is
also rich in antioxidants and essential minerals such as manganese, B
vitamins, folic acid, iron and magnesium.
We only had access to Duru Course Bulgur so we created this Chicken Bulgur Soup Recipe with it and sharing it with you. Hope you will like it!
We only had access to Duru Course Bulgur so we created this Chicken Bulgur Soup Recipe with it and sharing it with you. Hope you will like it!
 |
| Chicken Bulgur Soup (When All Ingredients are Added) |
Chicken Bulgur Soup Recipe
Ingredients
- 1 cup Duru coarse bulgur (available online through goodwill.market/)
- 1 lb. skinless shredded chicken breast or thigh
- 2 tbsp olive oil
- 1 large onion, chopped
- 1 tsp minced garlic
- 2 carrots, peeled and diced
- 2 celery stalks, diced
- 1 can diced tomatoes, drained
- 2 tbsp tomato paste
- 1 can chickpeas, drained and rinsed
- 1 tbsp baharat or garam masala (available in Assad Minimart in Manila 250 php/250 grams)
- 1 tbsp ground coriander
- 1/2 tsp cinnamon
- 4 cups chicken stock
- 3 cups hot water (plus more as desired)
- Salt, pepper and sugar to taste
Garnish Ingredients
- 2 tbsp fresh cilantro / wansoy, chopped
- 1 lemon, cut into wedges
Equipment and Tools
- Deep Pan with Cover
- Stirrer
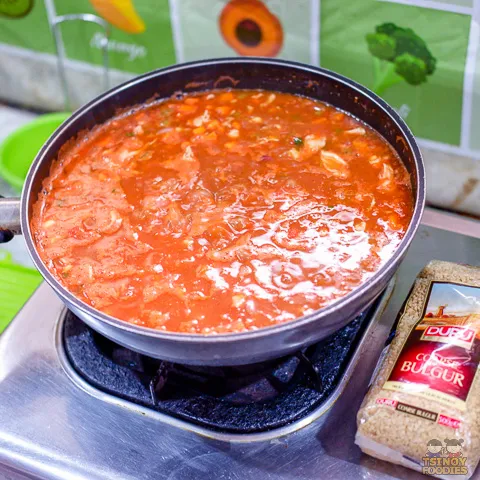 |
| Chicken Bulgur Soup Simmered |
Procedure
- Step 1: Sauté the onion and garlic over medium heat until softened.
- Step 2: Add the carrots and celery, and sauté for for more 2 minutes.
- Step 3: Add chickpeas, tomatoes, tomato paste, baharat, coriander and cinnamon and stir and sauté for 1 minute
- Step 4: Add shredded chicken and season with salt, pepper and sugar to taste.
- Step 5: Add 1 cup coarse bulgur and cook for 2 to 3 minutes.
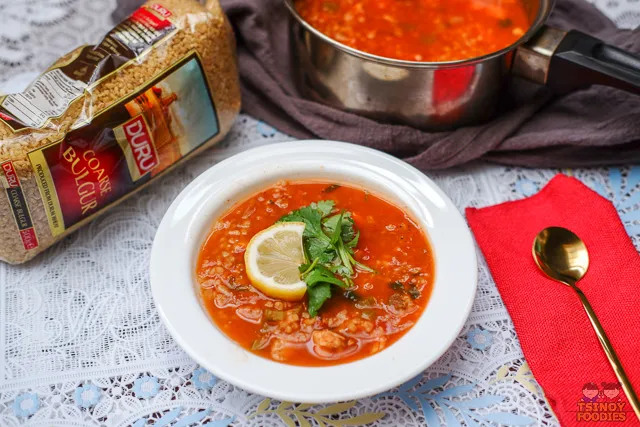 |
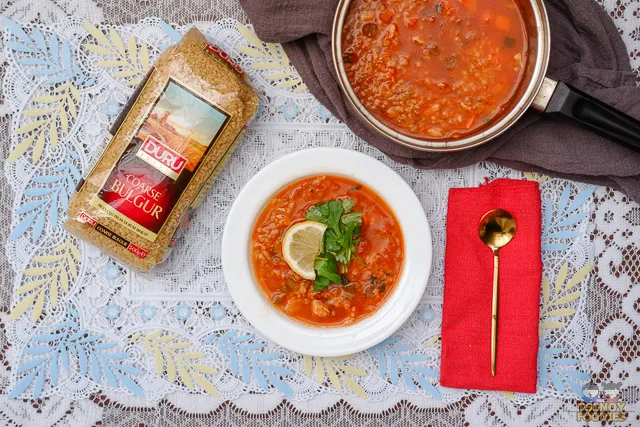
| Chicken Bulgur Soup Served Warm With Garnishment |
- Step 6: Add chicken stop and 3 cups of water and simmer for 20-25 minutes (depending on the plumpness of bulgur you desire).
- Step 7: Garnish with lemon wedge and sprinkle with cilantro.
- Step 8: Serve warm.
| Tsinoy Foodies Chicken Bulgur Soup Recipe Rating | |
| Recipe Difficulty Level | ★★ |
| Estimated Preparation Time | 15 minutes |
| Estimated Cooking Time | 30 minutes |
Also sharing Duru Bulgur Lugaw Recipe by Chef RJ Ramos

Ingredients
- 1 cup Duru Bulgur Coarse
- Chicken Breast & Thighs
- ¼ cup onions
- 1 tbsp garlic
- 1 tbsp ginger
- 4 cups Chicken Broth
- Garnish Ingredients
- Tofu
- Crispy Garlic
- Spring Onions
- Egg
Procedure
- Step 1: Prepare all the usual ingredients in making porridge, like chicken, onions and garlic, and ginger, but swap out white rice for Coarse Bulgur.
- Step 2: Boil some water then add some ginger and chicken. Cook it for 25 minutes.
- Step 3:In another pot, saute the onions, garlic, and ginger.
- Step 4: Add 1 cup of Coarse Bulgur and add 4 cups of chicken broth. Let it simmer for 15 minutes.
- Step 5: Add shredded chicken and season with salt, pepper and fish sauce according to your taste. Mix thoroughly an let it boil for 15 minutes.
- Step 6: To make this Filipino favorite even more special, you may garnish your bowl of steaming hot Duru Bulgur Lugaw with more shredded chicken, hard boiled egg, fried tofu, and spring onions.
Like This Post? Subscribe here Follow @tsinoyfoodies
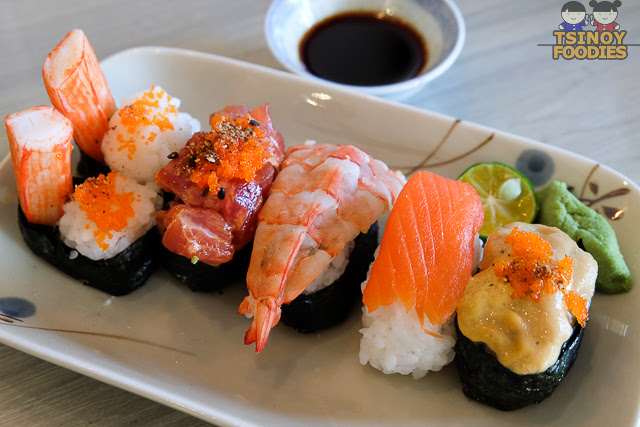
Last month, my friends Sumi, Berylle and I were invited by Kikkoman to go through an Oriental Cuisine Course at 25 Mushrooms Kitchen. The last time we had a cooking session together was way back in 2012 when we had an outing at Chilline T House in Tagaytay. We've been meaning to have a cookout again but we somehow couldn't find the time. So, you can imagine how excited we were when the opportunity suddenly presented itself.
Let me and the girls share with you the recipes we learned.
Dish 1: Tiger Prawns (Ebi), Salmon, Spicy Tuna, Uni and Kani Sushi Platter
Sushi Rice Ingredients
1 cup Japanese rice (uncooked)
1 1/4 cups Water
Sweet Sushi Vinegar Ingredients:
1/4 cup Japanese Vinegar
1 Tbsp Sugar
Pinch Salt
How to Make Sushi Rice: Rice
Step 1: Wash the Japanese rice till water is clear (6 times)
Step 2: Soak in water for 15 mins.
Step 3: After washing and soaking Japanese rice, cook it in the rice cooker (same as ordinary rice)
How to Make Sushi Rice: Sushi Vinegar Mixture for Rice
Step 1: Mix the rice vinegar, sugar, and salt in a saucepan
Step 2: Put the pan on low heat and heat until the sugar dissolves
Step 3: Cool the Sushi Vinegar Mixture
Step 4: Spread the hot steamed rice into a large plate or a large bowl
Step 5: Use a non-metallic bowl to prevent any interaction with Japanese vinegar
Tip: It's best to use a wooden bowl.
Step 6: Sprinkle the Sushi Vinegar Mixture over the rie and fold the rice by rice spatula quickly
Caution: Avoid smashing the rice
Tip: Use electric fan or fan to cool and remove the moisture of the rice well so it will be shiny and use it immediately upon being cooled.
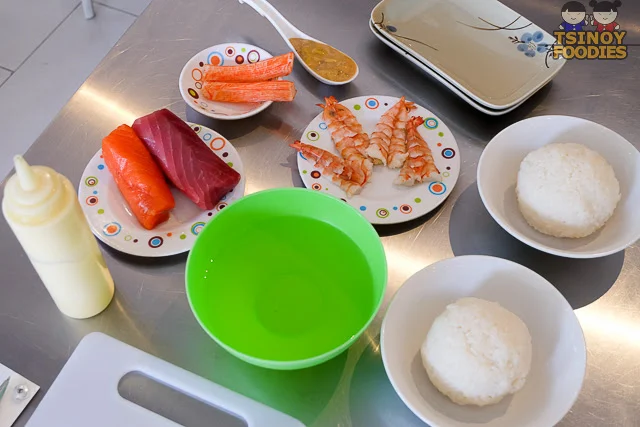
Ingredients
Step 1: Roll the Sushi Rice into a ball.
Tip: If the rice is too thick, pull the excess rice out and don't try flatten it by pressing harder.
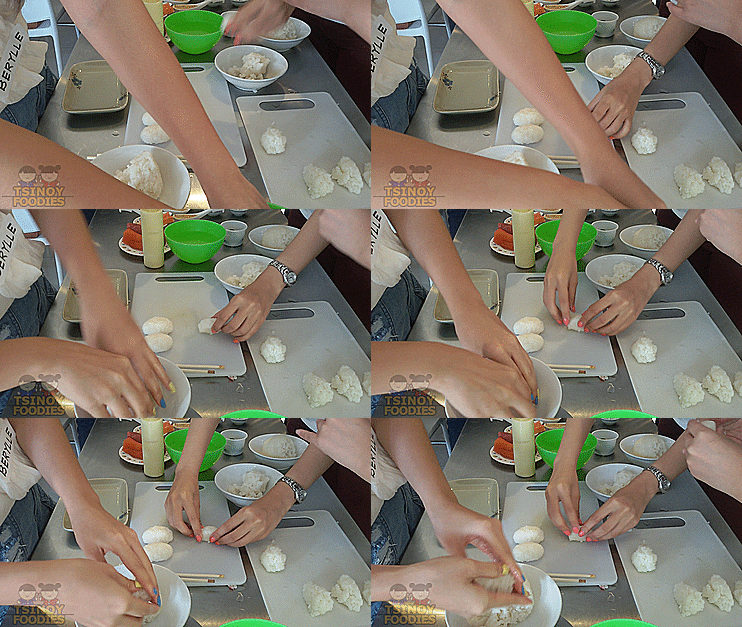 Step 2: Mold the Sushi Rice
 Step 3: Make the Spicy Tuna (Mix in a bowl: 2 tbsp Kewpie Japanese Mayonaise, 1 tbsp. Sriracha, chili powder and diced tuna) - adjust according to taste preference
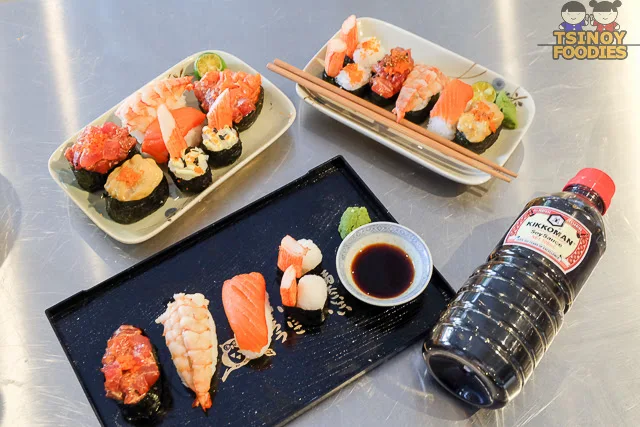
Step 4: Add other toppings on Sushi Rice and wrap in seaweed paper
Dishes 2: Katsudon (Serves 2-3 Persons)
Ingredients for Tonkatsu
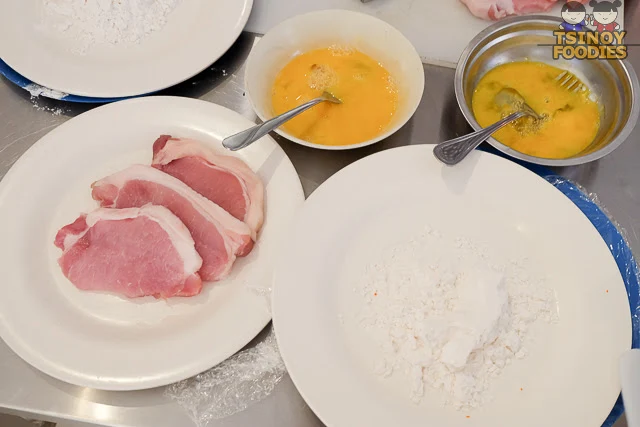
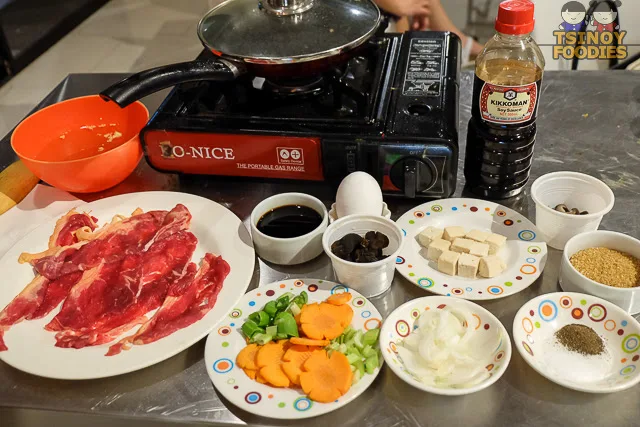
I Will Be Giving a 25 Mushroom Kitchen Pass (Worth 1,500)
2 ways to enter.
Facebook
1. Like Tsinoy Foodies and Kikkoman Philippines in Facebook.
2. Post a photo of a dish you cooked with Kikkoman.
3. Tag me (Tsinoy Foodies) and (Kikkoman Philippines) and use the hashtag #CookedWithKikkoman
4. Make your post public so I can see it.
Instagram
1. Follow @Tsinoyfoodies in Instagram.
2. Post a photo of a dish you cooked with Kikkoman. 3. Tag me (Tsinoy Foodies) and use the hashtag #CookedWithKikkoman
4. Make your post public so I can see it.
Post as many entries as you can. I will announce the winner on June 30, 2016.
Like This Post? Subscribe here Follow @tsinoyfoodies
Let me and the girls share with you the recipes we learned.
Dish 1: Tiger Prawns (Ebi), Salmon, Spicy Tuna, Uni and Kani Sushi Platter
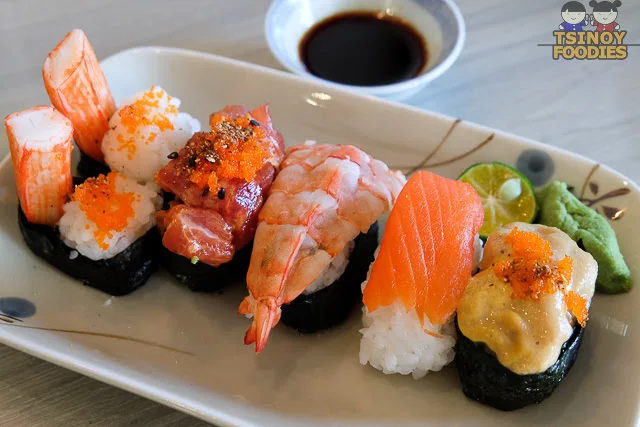 |
| Made by Yours Truly =) |
1 cup Japanese rice (uncooked)
1 1/4 cups Water
Sweet Sushi Vinegar Ingredients:
1/4 cup Japanese Vinegar
1 Tbsp Sugar
Pinch Salt
How to Make Sushi Rice: Rice
Step 1: Wash the Japanese rice till water is clear (6 times)
Step 2: Soak in water for 15 mins.
Step 3: After washing and soaking Japanese rice, cook it in the rice cooker (same as ordinary rice)
How to Make Sushi Rice: Sushi Vinegar Mixture for Rice
Step 1: Mix the rice vinegar, sugar, and salt in a saucepan
Step 2: Put the pan on low heat and heat until the sugar dissolves
Step 3: Cool the Sushi Vinegar Mixture
Step 4: Spread the hot steamed rice into a large plate or a large bowl
Step 5: Use a non-metallic bowl to prevent any interaction with Japanese vinegar
Tip: It's best to use a wooden bowl.
Step 6: Sprinkle the Sushi Vinegar Mixture over the rie and fold the rice by rice spatula quickly
Caution: Avoid smashing the rice
Tip: Use electric fan or fan to cool and remove the moisture of the rice well so it will be shiny and use it immediately upon being cooled.
- Fresh Salmon (darker orange better quality)
- Fresh Tuna
- Kewpie Japanese Mayonnaise
- Sriracha
- Togarashi Powder (optional for garnish)
- Boiled tiger prawn (use stick while boiling to keep it straight and slice in the middle)
- Boiled Kani (crab stick)
- Uni
- Sushi Rice
- Seaweed Paper
- Have a bowl of clean water so you can dip your hands in when it gets too sticky.
Step 1: Roll the Sushi Rice into a ball.
Tip: If the rice is too thick, pull the excess rice out and don't try flatten it by pressing harder.
 |
| Upper Left: Berylle's, Upper Right: Mine and Lower Middle: Sumi's |
Step 4: Add other toppings on Sushi Rice and wrap in seaweed paper
| Tsinoy Foodies Sushi Platter Recipe Rating | |
| Recipe Difficulty Level | ★★ |
Estimated Preparation Time | 20 minutes |
Estimated Cooking Time | 20 minutes per batch |
Dishes 2: Katsudon (Serves 2-3 Persons)
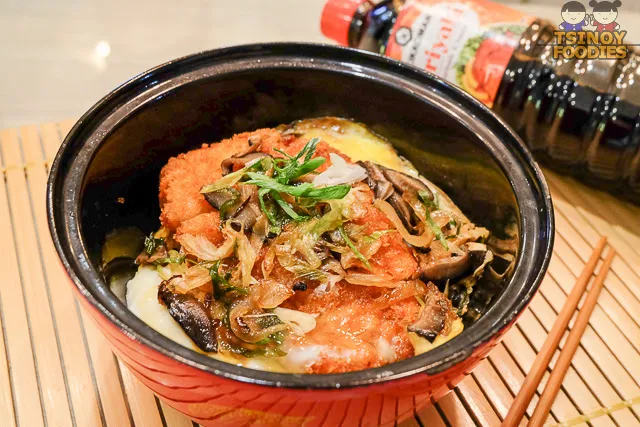 |
| Made by Yours Truly =) |
Ingredients for Tonkatsu
- 200 grams Porkloin or 2 pieces Pork Chop (no skin)
Ingredients for Tonkatsu Breading
Step 1: Remove bone skin from pork if using pork chop.
Step 2: Pound the pork to flatten
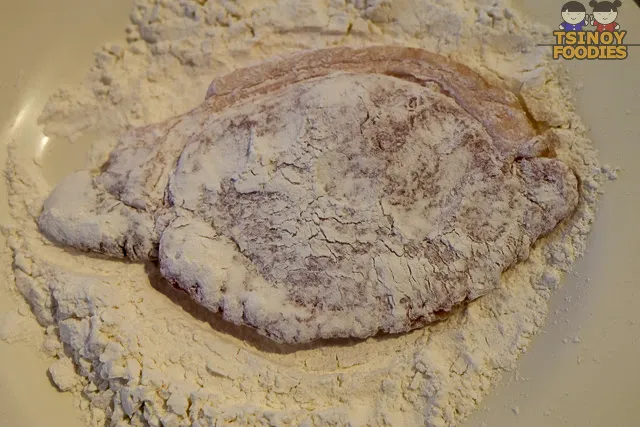 Step 3: Season with salt and pepper and then coat pork with flour .
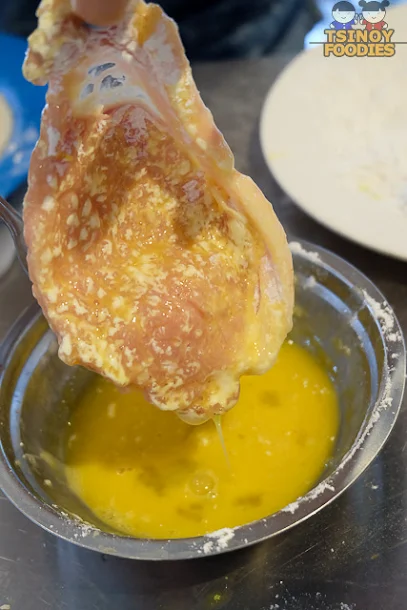
Step 4: Dip floured pork into bowl of beaten egg.
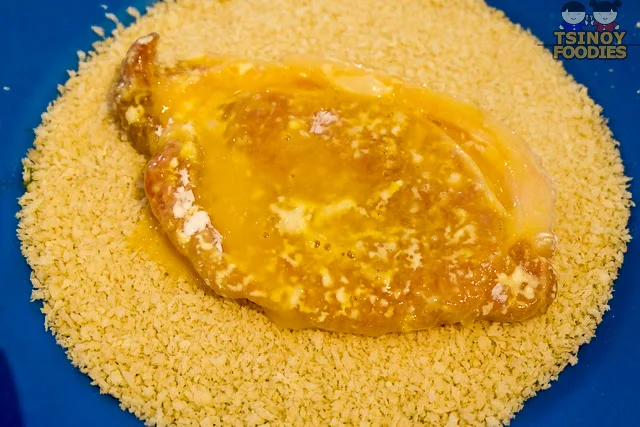
Step 5: Coat pork with breadcrumbs.
Step 6: Heat the oil and deep fry the breaded pork.25 mushrooms kitchen kikkoman recipe
Ingredients for Katsudon Sauce
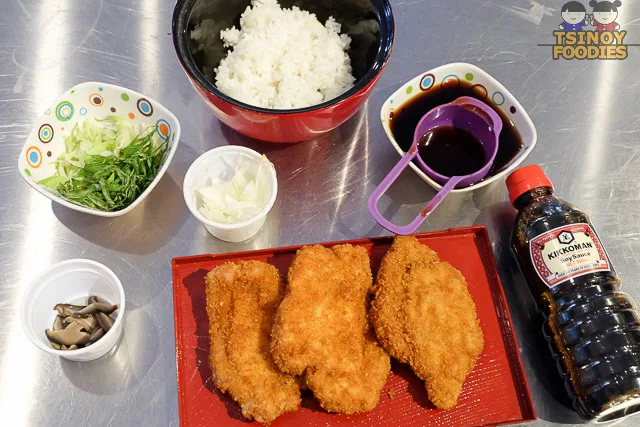
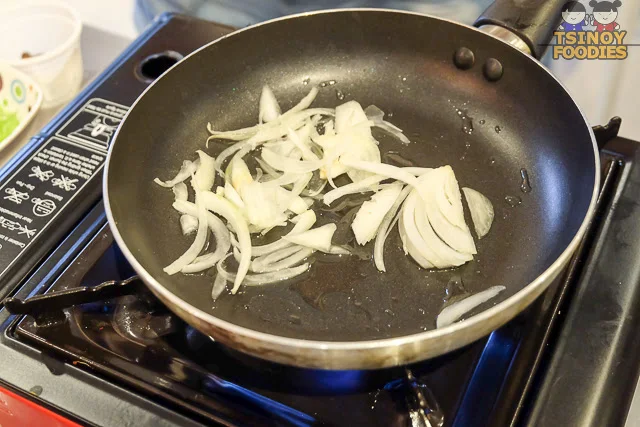
Step 2: In a skillet, add oil and saute with 1/2 cup of leeks, onions and mushrooms.
Tip: Onions first
Step 3: Add 1/4 up of teriyaki sauce and 1/2 dashi. (add sugar if preferred)

Step 4: Slice the Tonkatsu.
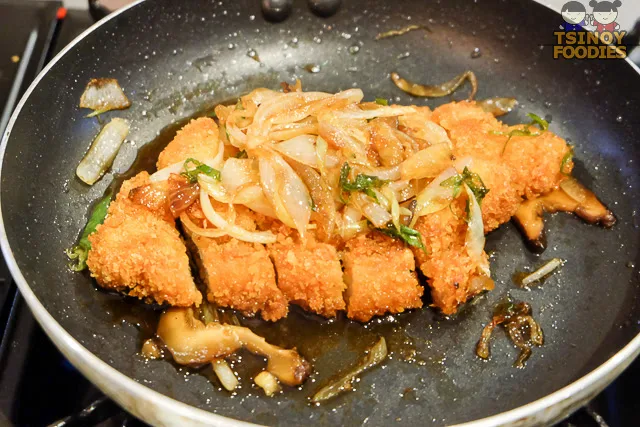 Step 4: Add 1 of the Tonkatsu.
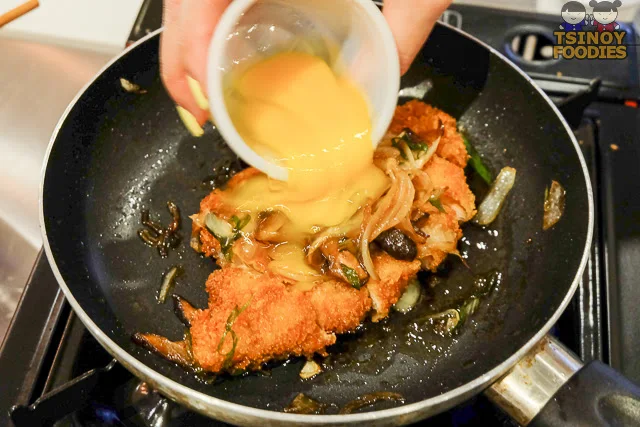
Step 5: Pour the lightly mixed eggs on top of the Tonkatsu.
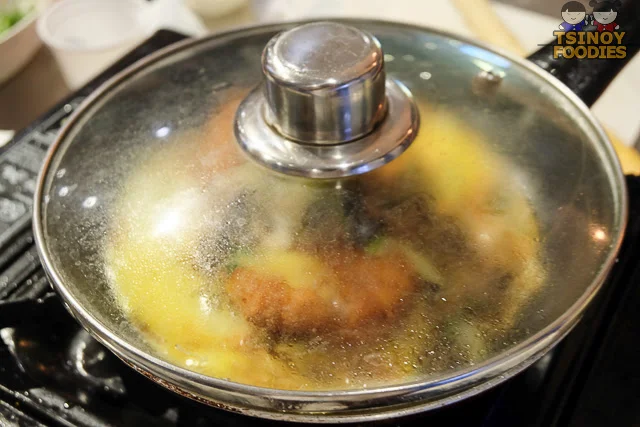 Step 6: Cook for 1 minute with cover.
Step 7: Pour over Japanese Steamed Rice (add sliced seaweed paper for garnish)
- 1/2 cup flour
- 2 pcs. beaten eggs
- 1 cup panko breadcrumbs
- oil for deep frying
Step 1: Remove bone skin from pork if using pork chop.
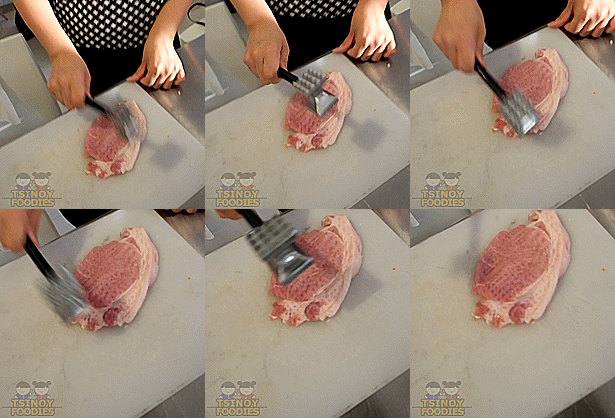 |
| Sumi of ThePurpleDoll.Net pounds to flatten the pork |
Step 4: Dip floured pork into bowl of beaten egg.
Step 5: Coat pork with breadcrumbs.
 |
| Sumi Breads Her Tonkatsu |
Step 6: Heat the oil and deep fry the breaded pork.25 mushrooms kitchen kikkoman recipe
Ingredients for Katsudon Sauce
- 1 cup thinly sliced leeks
- 1 cup thinly sliced onions
- 1 cup thinly slicedand soaked in water dried shiitake mushrooms
- oil for cooking
- 1/4 cup Kikkoman Teriyaki Sauce
- 1 Cup Dashi (1 1/2 Tbsp. hondashi + 1 cup of water)
- 1 Tsp. Sugar (optional)
- 4 pcs. Egg
Step 2: In a skillet, add oil and saute with 1/2 cup of leeks, onions and mushrooms.
Tip: Onions first
Step 3: Add 1/4 up of teriyaki sauce and 1/2 dashi. (add sugar if preferred)
Step 4: Slice the Tonkatsu.
Step 5: Pour the lightly mixed eggs on top of the Tonkatsu.
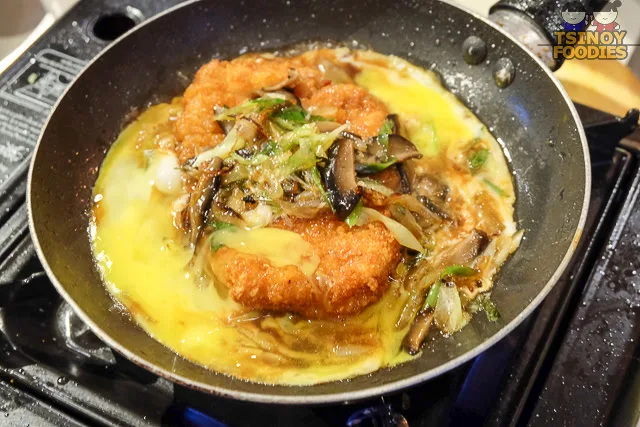 |
| This is what it looks like when it's ready! |
| Tsinoy Foodies Katsudon Recipe Rating | |
| Recipe Difficulty Level | ★★★ |
Estimated Preparation Time | 30 minutes |
Estimated Cooking Time | 30 minutes per batch |
Dish 3: Beef Sukiyaki (5 Servings)
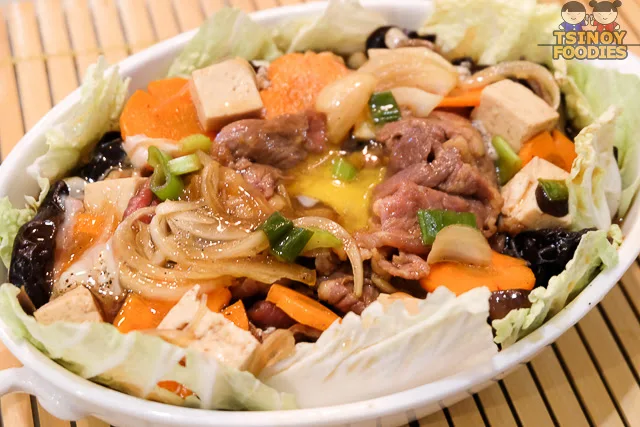 |
| This was done by group and I have to thank the girls who did most of this! Itadakimasu! |
Ingredients for Beef Sukiyaki
200 grams Beef Sirloin, Sukiyaki Cut (Thinly Sliced)
1/2 Cup Kikkoman Standard Grade Soy Sauce
1 pc. Sliced Medium Onion
1 pc. Sliced half moon small carrot
1 stalk Sliced celery (reserve leaves)
2-3 pcs Sliced Tenga ng Daga mushrooms (soaked overnight)
3 Tbsp. Brown Sugar
2 1/2 Meat Broth or Water
100 grams Cube-cut and blanched tofu
75 grams Sotanghon
100 grams Sliced Chinese Cabbage in strips
3 pcs. Eggs
1 Stalk Sliced Leek
Procedure of Sukiyaki
Step 1: Mix beef and 2 Tbsp. of Kikkoman Soy Sauce.
Step 2: Saute by batch in 2-3 Tbsp. oil until Brown. Set Aside.
Step 3: Season tofu with 1 Tbsp. of Kikkoman Soy Sauce. Set Aside.
Step 4: In the same pan, saute onion, carrot, celery and mushrooms.
 |
| Sumi Takes Care of the Stirring |
Step 5: Add remaining Kikkoman Soy Sauce, brown sugar, mushroom broth, 1/4 Tsp. pepper then stir.
Step 6: Cover and simmer for 5 minutes.
Step 7: Add tofu, sotanghon, beef, cabbage and lastly, the egg. Top with leeks and garnish with celery leaves.
| Tsinoy Foodies Sukiyaki Recipe Rating | |
| Recipe Difficulty Level | ★★ |
Estimated Preparation Time | 30 minutes |
Estimated Cooking Time | 30 minutes per batch |
#CookedWithKikkoman Giveaway!!!
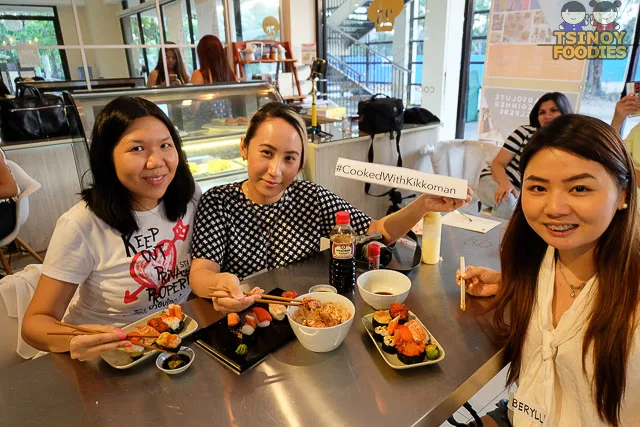 |
| Thanks 25 Mushrooms Kitchen and Kikkoman! (Thanks Ms. Joy of GastronomyByJoy.Com for this shot) |
I Will Be Giving a 25 Mushroom Kitchen Pass (Worth 1,500)
2 ways to enter.
1. Like Tsinoy Foodies and Kikkoman Philippines in Facebook.
2. Post a photo of a dish you cooked with Kikkoman.
3. Tag me (Tsinoy Foodies) and (Kikkoman Philippines) and use the hashtag #CookedWithKikkoman
4. Make your post public so I can see it.
1. Follow @Tsinoyfoodies in Instagram.
2. Post a photo of a dish you cooked with Kikkoman. 3. Tag me (Tsinoy Foodies) and use the hashtag #CookedWithKikkoman
4. Make your post public so I can see it.
Post as many entries as you can. I will announce the winner on June 30, 2016.
Like This Post? Subscribe here Follow @tsinoyfoodies
/
Subscribe to:
Posts (Atom)